


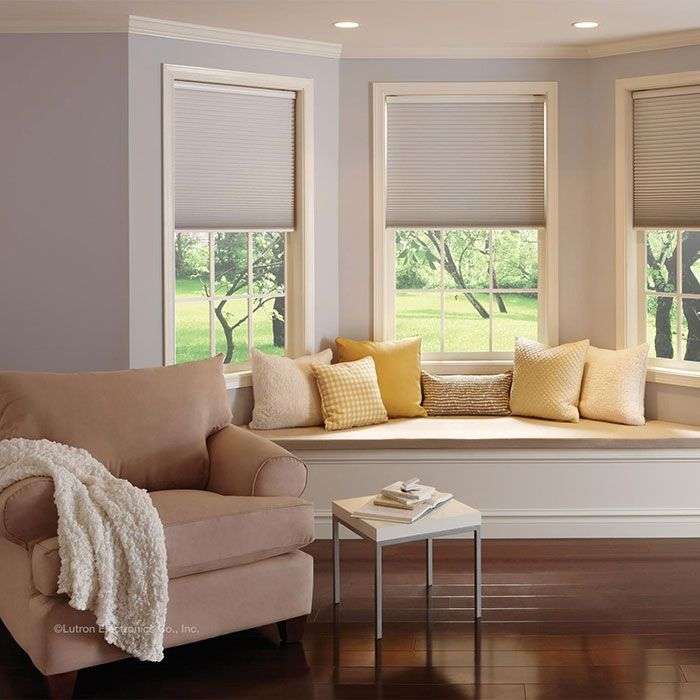
How to Hang Cellular Shades
Cellular shades, also called honeycomb shades, are one of the easiest window coverings to install yourself. They insulate well, they look clean, and the hardware is simple. Most people finish the first window in under thirty minutes once the measuring is done. This guide shows you how to hang cellular shades step by step, from choosing the mount type to testing the shade, so it hangs level and works smoothly from day one.
Before you start
A little preparation makes the job much easier. Gather your tools and check that the shade and hardware are complete before you drill anything.
- A pencil and a metal tape measure
- A level, ideally a short one that fits inside the window frame
- A drill with a small bit for pilot holes and a screwdriver bit
- A step stool or small ladder
- The mounting brackets and screws that came with the shade
- Wall anchors, if you are mounting into drywall and cannot reach wood
Open the box and lay out the pieces on a soft surface. You should have the shade with its headrail, the brackets, the screws and any extras such as a cord cleat, a valance or a safety tag. If anything is missing, contact the seller before you start. If you ordered custom shades, check the label on the headrail to make sure the width matches the window you are about to install it in.
Step 1: Choose inside mount or outside mount
The mount type decides where the brackets go, so it is worth confirming before you pick up the drill.
- Inside mount: the shade sits within the window frame. It gives a clean, built in look and works well when the frame is deep enough for the headrail.
- Outside mount: the shade sits on the wall or trim above the window. It suits shallow frames, windows that are not square and rooms where you want the shade to cover the whole opening and a little more.
Your shade was made for one of these. An inside mount shade is cut slightly narrower than the opening so it clears the frame, and an outside mount shade is cut wider than the opening so it covers the edges. Do not change the mount type without checking with the manufacturer. If you want to learn more about how the shades are built, our guide to what cellular shades are covers the main types.
Step 2: Mark the bracket positions
Hold the shade up to the window with the headrail in its final position. Use the pencil to mark where the ends of the headrail fall.
For an inside mount, the brackets usually go on the top of the frame, a few inches in from each end. The headrail should sit slightly back from the front edge of the frame so the shade does not rub on the window trim. For wider shades, add a center bracket so the headrail does not sag.
For an outside mount, the brackets go on the wall or trim above the window. Leave about two to three inches of overlap on each side of the window and about the same above the frame. Mark both ends first, then mark the center on wider shades.
Place the brackets on your marks and use the level to check that they line up. Even a small tilt in the brackets becomes a visible tilt in the shade.
Step 3: Install the brackets
Drill small pilot holes at each mark. A pilot hole keeps the wood from splitting and gives the screws a clean path.
- Hold the first bracket on its mark and drive the screws in until the bracket sits firmly against the surface.
- Install the second bracket at the other end.
- Place the level across both brackets to check they are at the same height. Adjust if one is off.
- Install any center brackets after the end brackets are level.
If you are screwing into drywall with no stud behind it, use wall anchors. Drywall alone cannot carry a shade that is pulled up and down every day. For outside mounts on trim, check that the trim is solid wood and not thin molding.
Step 4: Attach the headrail to the brackets
Most cellular shades hang by clipping the headrail into the brackets. The exact design varies by brand, but the idea is the same.
- Raise the shade so the fabric is stacked up and out of the way.
- Tilt the front edge of the headrail into the front lip of each bracket.
- Press the back of the headrail up and in until it clicks. Some brackets have a small latch, and some have a spring clip.
- Give the headrail a gentle tug to confirm it is locked in.
If the headrail will not seat, do not force it. Check that the brackets are facing the right direction and are spaced to match the headrail. A bracket that is slightly too far in or out is the most common reason a headrail will not click.
Step 5: Test the shade
Lower the shade all the way to the sill and then raise it back to the top. Watch for these signs.
- The bottom rail stays level as it moves
- The fabric does not rub on the frame or the wall
- The shade stays where you leave it, partly open or fully closed
- There are no gaps at the sides that look larger than the others
If something looks off, our guide to how to fix cellular shades that will not work covers the common causes, from tangled cords to brackets that are not seated evenly.
Step 6: Handle cords and safety
If your shade has a cord, install the cord cleat or tension device that came with it. Mount it on the wall or window frame at a height out of reach of children and pets, following the instructions in the box. Cordless shades avoid the issue completely, which is why many homeowners choose them for bedrooms and nurseries.
Special cases
Top down bottom up shades
These shades have two rails and two sets of cords, so they are heavier at the headrail. Use the center bracket if one was supplied, and test both rails after installation.
Wide windows and large shades
Large shades are heavy and awkward to hold while you clip them in. Ask someone to help lift one side while you seat the other. A second person also makes it easier to check that the shade is level.
Motorized shades
Motorized shades need a battery pack or a power connection. Plan where the power source will go before you set the brackets, and follow the manufacturer instructions for pairing the remote. Our guide to motorized shade battery life and maintenance helps you keep them running well.
Common mistakes to avoid
- Marking the brackets without checking them with a level
- Skipping the pilot holes and splitting the frame
- Using drywall screws alone where an anchor is needed
- Forcing the headrail into brackets that are not aligned
- Installing an inside mount shade as an outside mount, or the other way around
When to measure again or call a professional
If the shade does not fit the window, measure the opening again at the top, the middle and the bottom, and use the smallest width for an inside mount. Custom shades cannot be trimmed, so a wrong measurement usually means a new shade. Our free measuring service helps you avoid that problem, and you can see the options on our cellular honeycomb shades page. If the window is very large, hard to reach or the shade is motorized and wired, ask a professional to install it. Shade.Shop serves homes across Sonoma, Napa and Marin, and you can see our service areas or contact us to book an installation. If you ever need to take the shade down again, our guide on how to remove cellular shades shows the steps.
Frequently asked questions
How long does it take to hang a cellular shade?
Most people need about twenty to thirty minutes for the first window, including marking the brackets. Additional windows go faster once you know the routine.
Can I hang cellular shades without drilling?
Some shades come with adhesive or tension mounts, but they are lighter duty and suit small windows. For most shades, screwed brackets are the safest and longest lasting option.
How far from the window should a cellular shade hang?
For an outside mount, the headrail sits a few inches above the frame with about two to three inches of overlap on each side. For an inside mount, the shade sits within the frame, slightly back from the front edge.
Do I need a stud to hang a cellular shade?
Not always. Brackets screwed into a wood window frame are usually solid. If you must mount into drywall, use wall anchors rated for the weight of the shade.
What if my window is not square?
An outside mount usually hides small differences, because the shade covers the edges. For an inside mount, measure at several points and ask the manufacturer for advice before ordering.
Living in Santa Rosa? Shade.Shop offers free in home measuring and installation for window shades in Santa Rosa, and across Sonoma, Napa and Marin.




Add comment